
It's Sam here and I have a Tutorial on how to make my project from this fortnight's challenge.
FREESTANDING FLOWERPOTS

- - - - - - - - - - - - - - -
FREESTANDING FLOWERPOTS
- - - - - - - - - - - - - - -
Supplies
THAT CRAFT PLACE MDF / GREYBOARD
MDF Freestanding Flowerpots
MDF Mini Tag
MDF Words - "Believe"
MEDIUMS USED
DecoArt Crafters Acrylic - Black
Black Gesso
White Gesso
Old, Unwanted Coarse Glitter
(or you could use coarse sand, or a ready mixed Texture Sand Paste)
Acrylic Paint (various brands)
Archival Ink (Tree Branch & Jet Black)
Mod Podge Gloss
Mod Podge Matte
Ranger Crackle Accents
Collall Silicone Glue Gel
OTHER PRODUCTS USED
8x8 Graphic 45 Paper Pad - "Artisan Style"
All products above available from That Craft Place.
ANYTHING ELSE
Brown Garden Twine
A vintage piece of gold patterned paper from my stash
- - - - - - - - - - - - - - -
Tutorial
This is the fabulous MDF freestanding flowerpots before I got my hands on it! It is of course available from That Craft Place!
I didn't pre-gesso this project because much of it was going to be covered in patterned paper.

STARTING WITH THE FLOWERPOTS:
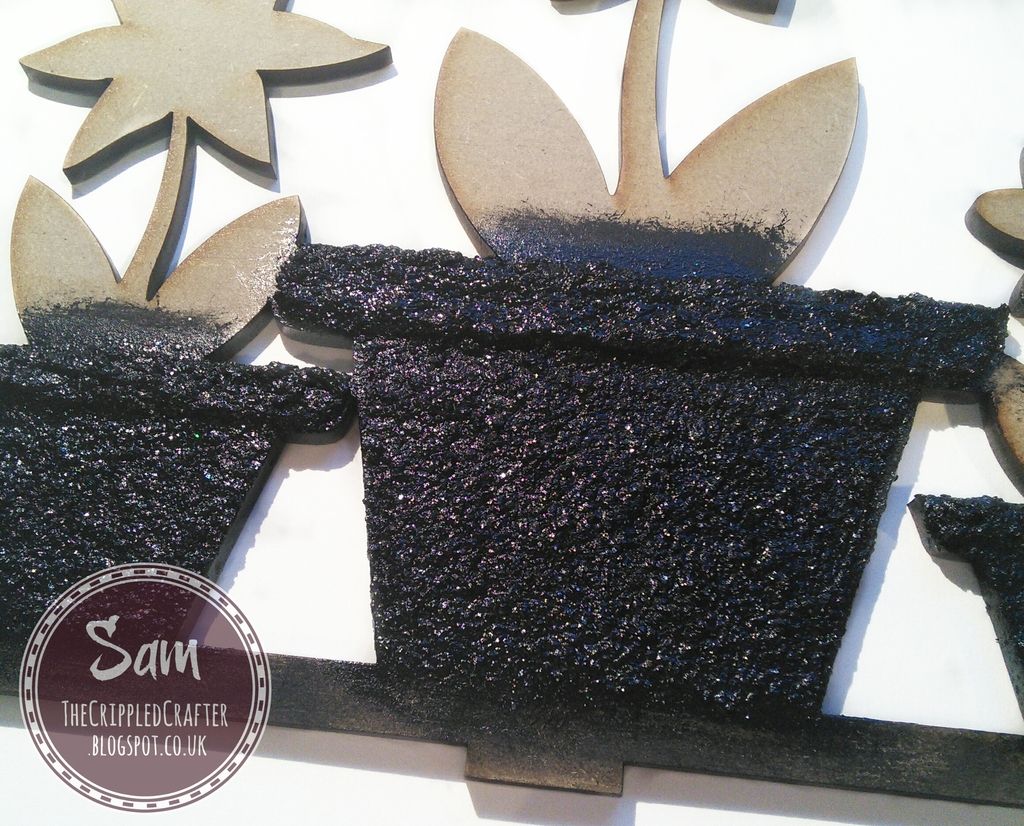
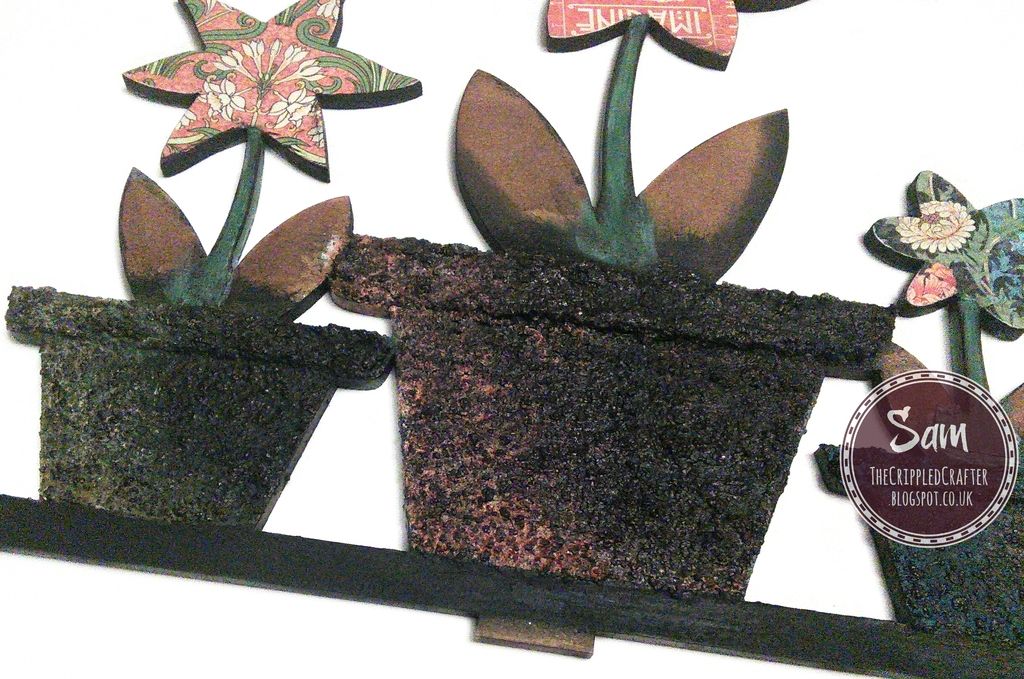
1... Mix together black gesso and cheap coarse glitter until it is the required consistency
(see supplies list above for alternatives to glitter).
TIP: I wanted it to be very "gritty" so added quite a lot of glitter to the gesso!
2... Apply the mixture to the pots using a stiff brush, adding an extra thick layer to the top edge to form the lip of the pot.
3... Allow to dry thoroughly.
(see supplies list above for alternatives to glitter).
TIP: I wanted it to be very "gritty" so added quite a lot of glitter to the gesso!
2... Apply the mixture to the pots using a stiff brush, adding an extra thick layer to the top edge to form the lip of the pot.
3... Allow to dry thoroughly.
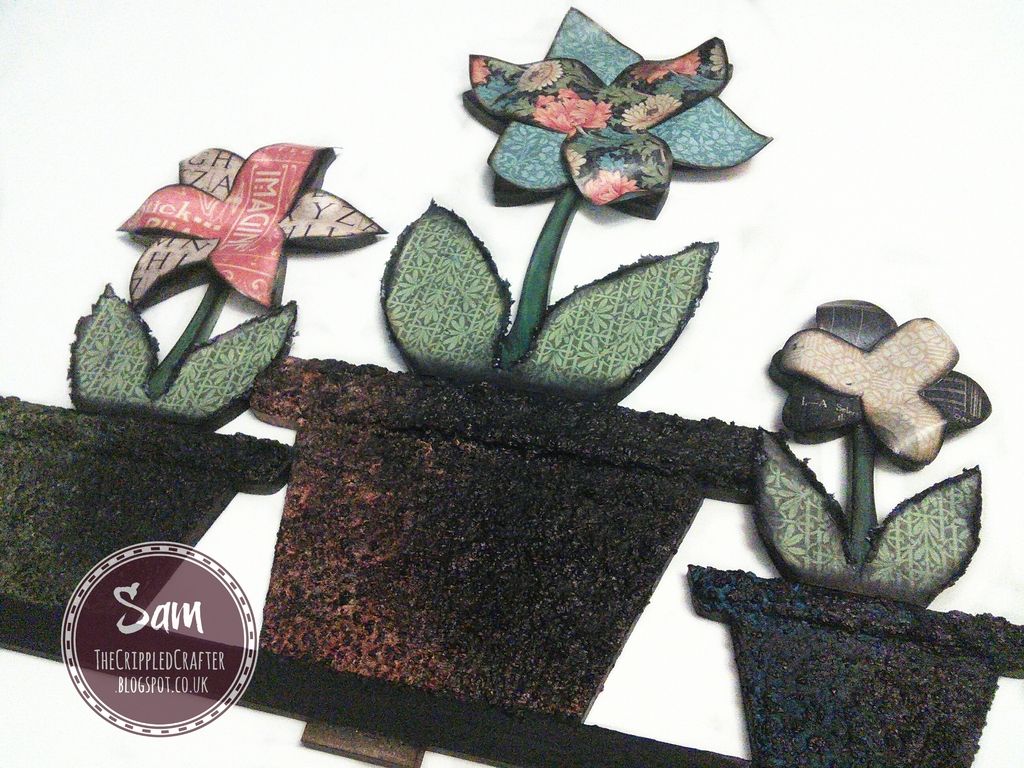
NEXT ONTO THE PAPERS FOR THE LEAVES AND FLOWERS
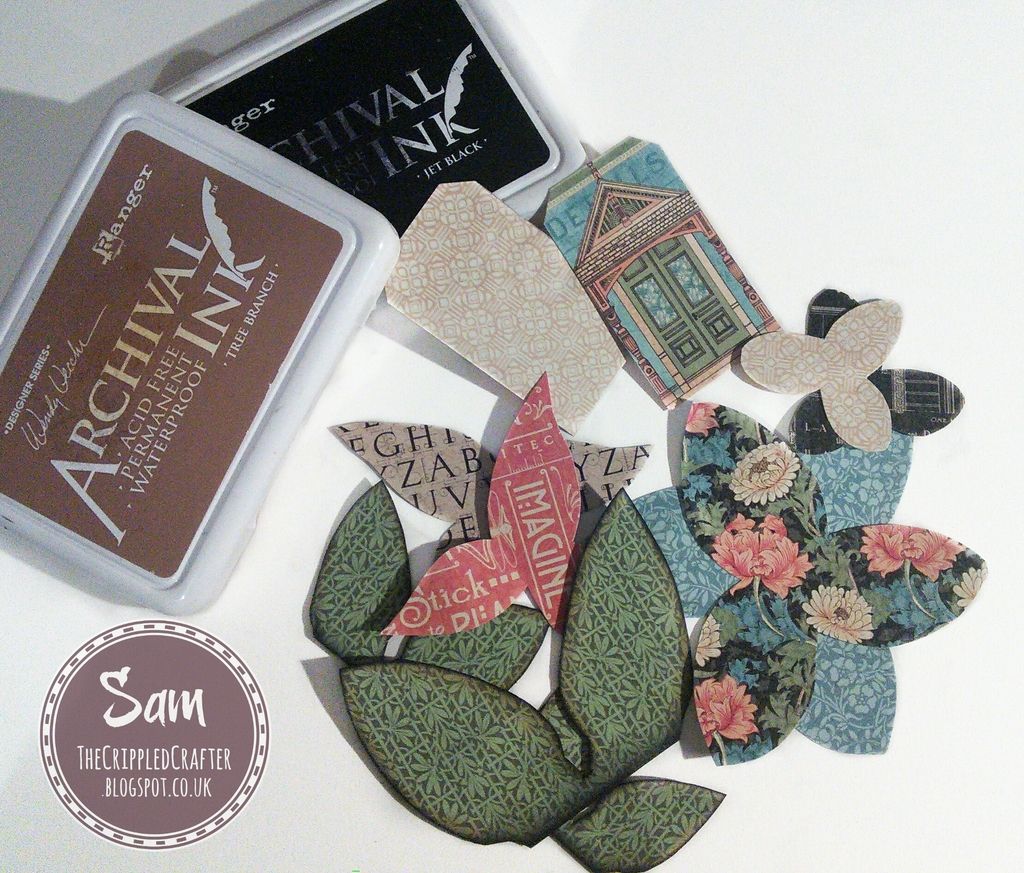
4... Lay the MDF piece face down on the reverse of your patterned paper and draw round the leaves .
5... Repeat several times with each chosen paper for the flowers.
Tip: I drew round alternate flower petals, choosing 2 papers for each flower for more interest.
6... Cut paper for the mini tag and glue to each side of the tag. Sand the paper off the edges to tidy.
7... Cut out all the leaves and flowers, cutting the pieces around 2 to 3mm bigger than the lines.
8... Using a distressing tool, or open edge of scissors, distress around the edges of the leaves (except the bottom edge).
9... Glaze the petal pieces with Mod Podge Matte.
10... Ink the edges of all the pieces with Archival Ink, first with "Tree Branch" then with "Jet Black".
NOW FLIP THE PIECE FACE DOWN
11... Paint the reverse and all the edges of the the piece as well as the bottom strip on the front. I used black crafters acrylic.
Tip: Avoid the tabs when adding paint, paper or any other medium to MDF pieces. This allows the pieces to still slot together nicely, otherwise extra bulk can make things a tight fit!

BACK TO THE FRONT, WITH THE FLOWERS FOR NOW:
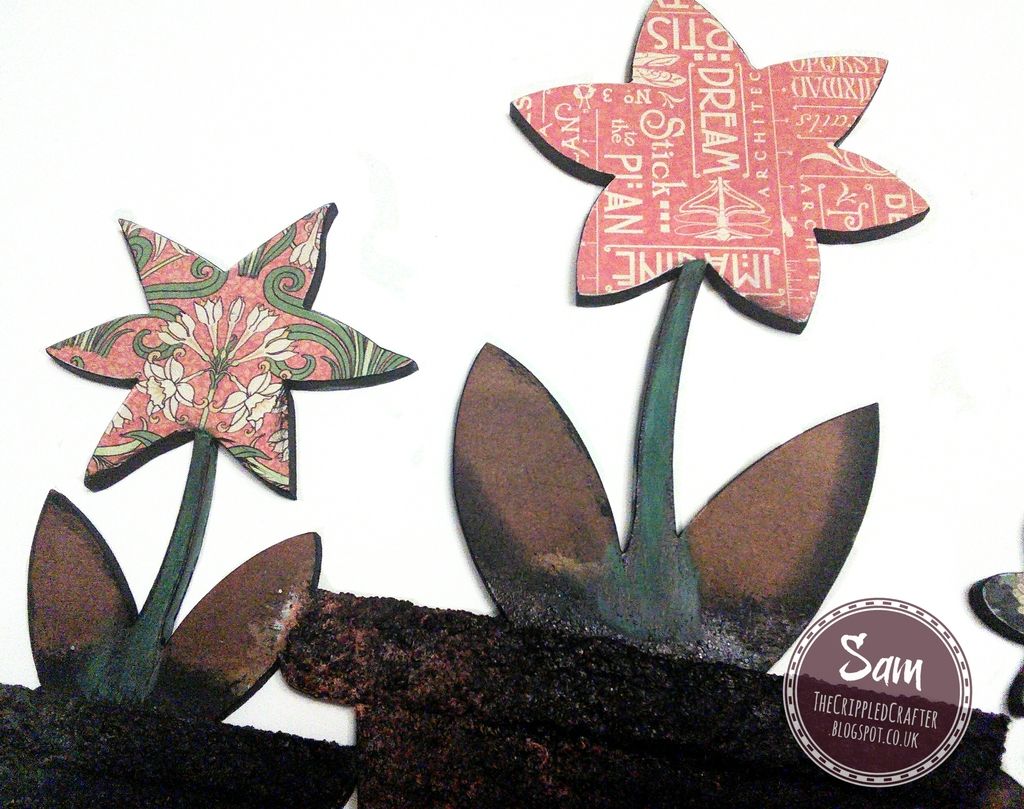
12... Paint the flower stems and dry before adding black Archival Ink to the edges.
13... Choose more papers and glue to the flowers! We will trim to size and tidy it up at a later stage.
(I just forgot to photograph them before trimming!).
NOW BACK TO THE FLOWERPOTS:
14... Using a dry brush and a tiny amount of white gesso, dry brush over the pots highlighting one side more than the other.
AND BACK UP TO THE FLOWERS!...
15... Trim roughly around the petals.
16... Using sandpaper or a sanding block, sand round the edges of the petals holding the sandpaper at a 45* angle so that the excess paper is smoothed away.
15... Trim roughly around the petals.
16... Using sandpaper or a sanding block, sand round the edges of the petals holding the sandpaper at a 45* angle so that the excess paper is smoothed away.
NOW TO ADD SOME COLOUR TO THE FLOWERPOTS
17... Dilute some acrylic paint to a wash consistency and brush over the flowerpots.
Tip: I chose 3 different colours as closely matched to colours in the papers as possible.
18... Using a sponge applicator, redefine some of the raised areas with black Archival Ink.
17... Dilute some acrylic paint to a wash consistency and brush over the flowerpots.
Tip: I chose 3 different colours as closely matched to colours in the papers as possible.
18... Using a sponge applicator, redefine some of the raised areas with black Archival Ink.
NOW TO ADD THE PAPERS TO THE MDF!
19... Glue the leaves to the piece, making sure it is stuck down all the way to the edges.
20... Using a bone folder, shape the petal pieces.
21... Add glue to the back centre only of the petal pieces and attach to the MDF.
19... Glue the leaves to the piece, making sure it is stuck down all the way to the edges.
20... Using a bone folder, shape the petal pieces.
21... Add glue to the back centre only of the petal pieces and attach to the MDF.
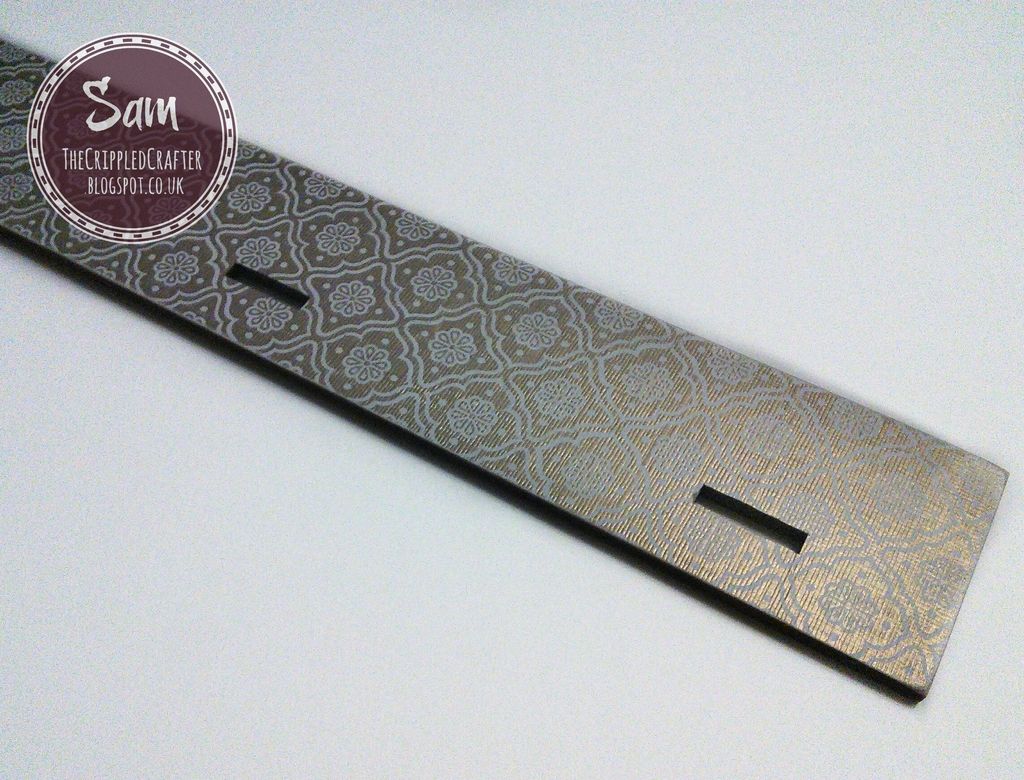
NOW FOR THE BASE
22... Paint the reverse and sides of the base with the black acrylic paint. Allow to dry.
23... Add paper to the top of the base piece.
24... Allow to dry before glazing over the top of the paper with Mod Podge.
25... Using a sharp knife, cut away the paper from the tab slots.
22... Paint the reverse and sides of the base with the black acrylic paint. Allow to dry.
23... Add paper to the top of the base piece.
24... Allow to dry before glazing over the top of the paper with Mod Podge.
25... Using a sharp knife, cut away the paper from the tab slots.
NEARLY THERE!....
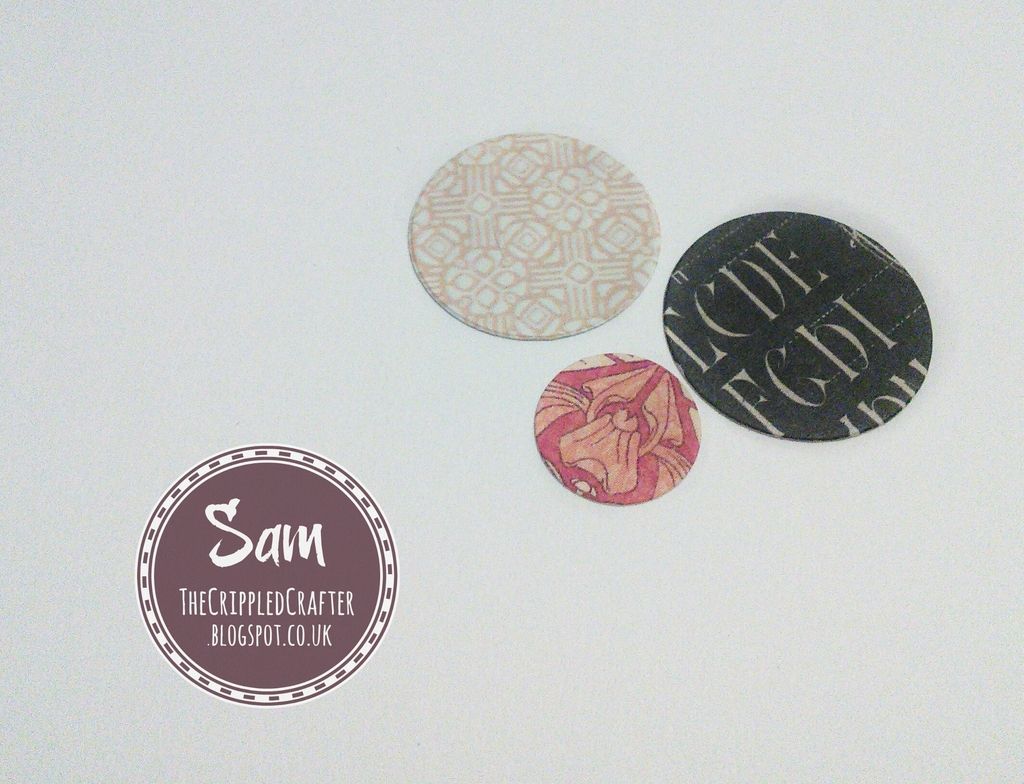
26... Using dies, cut circles to fit the centre of the flowers.
Tip: If you don't have any suitable dies, simply draw around bottle tops or similar, and cut out!
26... Using dies, cut circles to fit the centre of the flowers.
Tip: If you don't have any suitable dies, simply draw around bottle tops or similar, and cut out!
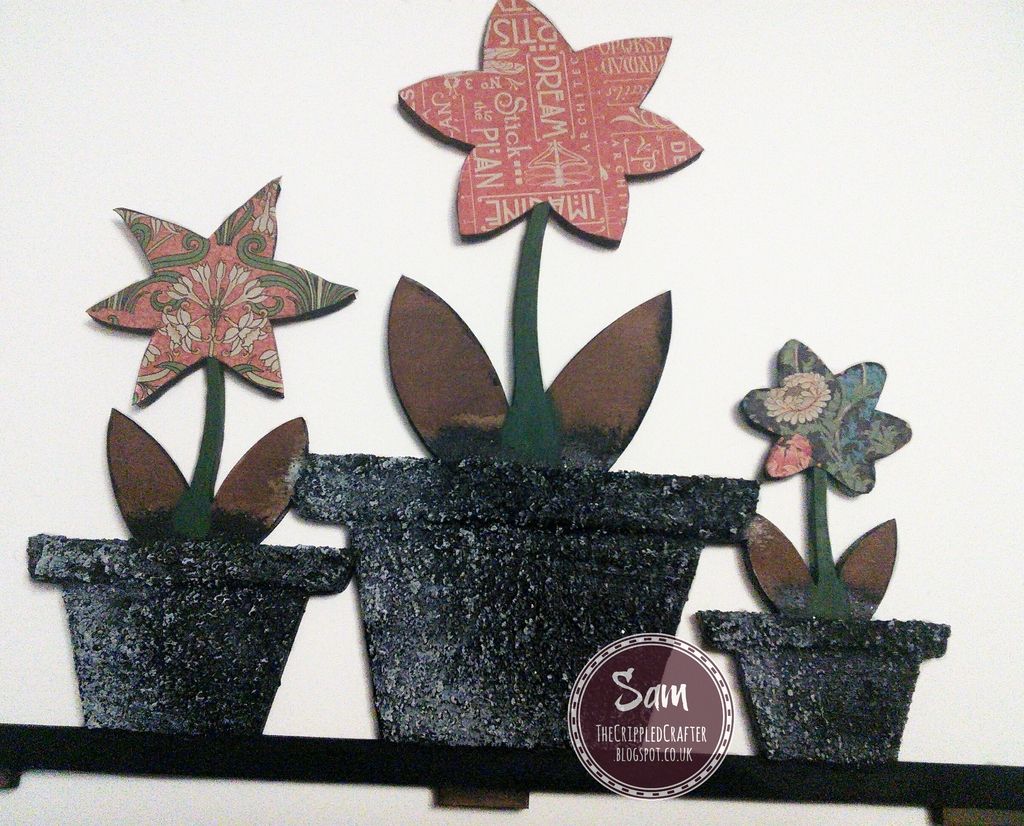
AND NOW FOR THE FINISHING TOUCHES
27... Again using a distressing tool or scissors, distress the edges of the circles.
28... Ink the edges with black Archival Ink.
29... Apply a thick layer of Crackle Accents to each circle.
30... Once completely dry, attach to the centre of each flower with silicone glue gel.
Tip: Add a generous blob of glue gel to give dimension.
31... Ink around the base piece with black Archival Ink.
32... Apply glue to the flowerpot piece, between the tabs, and firmly press together into the holes in the base piece.
33... Hold in place until a bond has formed. Allow to dry firm before continuing.
34... Attach the mini tag around the centre flower with twine, tying in a knot at the back.
35... Add the "Believe" sentiment.
ENJOY!
- - - - - - - - - - - - - - -
Links you need to know
That Craft Place Website
- - - - - - - - - - - - - - -
xxSAMxx
- - - - - - - - - - - - - - -
Don't forget our latest challenge is HERE
xxSAMxx
Love your effect on the plant pots Sam and great tip with the coarse glitter. Fab tutorial.
ReplyDeleteHugs, Julie x
Hi Sam this is stunning thank you for the tutorial. Hugs Jackie
ReplyDeleteLove the way you've used the plant pots. Great tutorial, Angela x
ReplyDelete