
Today is my designated day for a tutorial with That Craft Place. Following on from Sandra's brilliant gate fold mini album tutorial, I am going to show you another way of making an album. This time using the Tim Holtz ring binder and Gojuss papers from Docrafts.
You will need
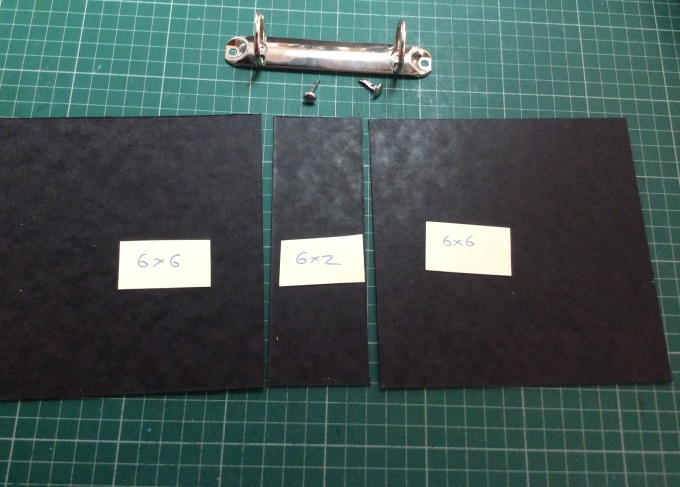
2 6x6 chipboard (or other strong board) squares for the front and back covers
1 6x2 chipboard piece for the spine
1 ring binder with 2 brads
2 8x8 paper for outer covers
1 8x4 paper for inside spine *after modification the paper is 6x4 ... this can be cut at the start.
1 8x5 paper for spine outside
2 5.75 x 5.75 paper for inside cover linings
1 inch and 1/2 inch double sided tapes
![FullSizeRender[1]](https://trudiehoward.files.wordpress.com/2016/02/fullsizerender1.jpg?w=680)
Centre the spine and use double sided tape to adhere to the paper.
![FullSizeRender[2]](https://trudiehoward.files.wordpress.com/2016/02/fullsizerender2.jpg?w=680)
Line up and centre ring binder and make holes all the way through for the brads to go.
![FullSizeRender[3]](https://trudiehoward.files.wordpress.com/2016/02/fullsizerender3.jpg?w=680)
Turn over and fix ring binder to the paper side of the spine using the brads. Run double sided tape down either side but do not peel back yet. Train paper to fold and put to one side.
*last minute modification! trim top and bottom of paper to line up with spine.
![FullSizeRender[4]](https://trudiehoward.files.wordpress.com/2016/02/fullsizerender4.jpg?w=680)
Cover front and back covers with paper. .
![FullSizeRender[2]](https://trudiehoward.files.wordpress.com/2016/02/fullsizerender21.jpg?w=680)
Line up front and back with the spine in the centre. Leave a gap approx. 4mm width between the covers and the spine to help fold. It isn't possible to measure it exactly due to bulkiness Make sure the covers face down and the ring binder faces up, this is because we want the binder on the inside of the album! Peel back tape and stick into place.
![FullSizeRender[1]](https://trudiehoward.files.wordpress.com/2016/02/fullsizerender11.jpg?w=680)
The outside should look like this. Run double sided tape just down the spine and centre your 8x5 piece to cover the outside. Once in place fold the binder carefully to create the creases, now use tape to stick outside paper to the covers. Fold carefully again.

Trim the top and bottom of the outer spine paper leaving 3/4 inch to fold over. Use double side tape to stick down. Use your bone folder to make folds in creases.
![FullSizeRender[1]](https://trudiehoward.files.wordpress.com/2016/02/fullsizerender12.jpg?w=680)
Line the inside of the covers with the remaining papers using double sided tape.
I then added metal corners to the album to help strengthen and protect them.
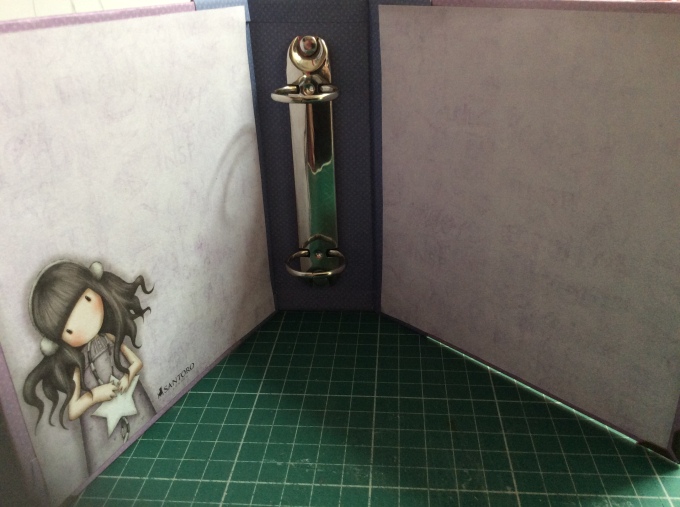

Your album base is now ready to decorate and use!
I hope this has made sense!
Don't forget our latest challenge is http://thatcraftplaceblog.blogspot.co.uk/2016/02/anything-goes-challenge-14th-february.html
Links you need to know
Brilliant tutorial Trudie, that worked out well! Angela xXx
ReplyDelete