Followers

Showing posts with label Mixed Media. Show all posts

Wednesday, 30 March 2016

Steampunk Shrine Tutorial by Julie Lavalette


Hi Everyone, it's Julie here today from Juliz Design Post and I am sadly sharing my last DT tutorial with you at present here at That Craft Place, as our challenge blog and Natter and chatter group are taking a long extended holiday.

Lisa sells the most beautiful MDF Shrines in different shapes along with great embellishments to add to them in Greyboard and MDF, so please check out her shop links at the end of my post as these will still be remaining open.

So let me take you through the process of my shrine.


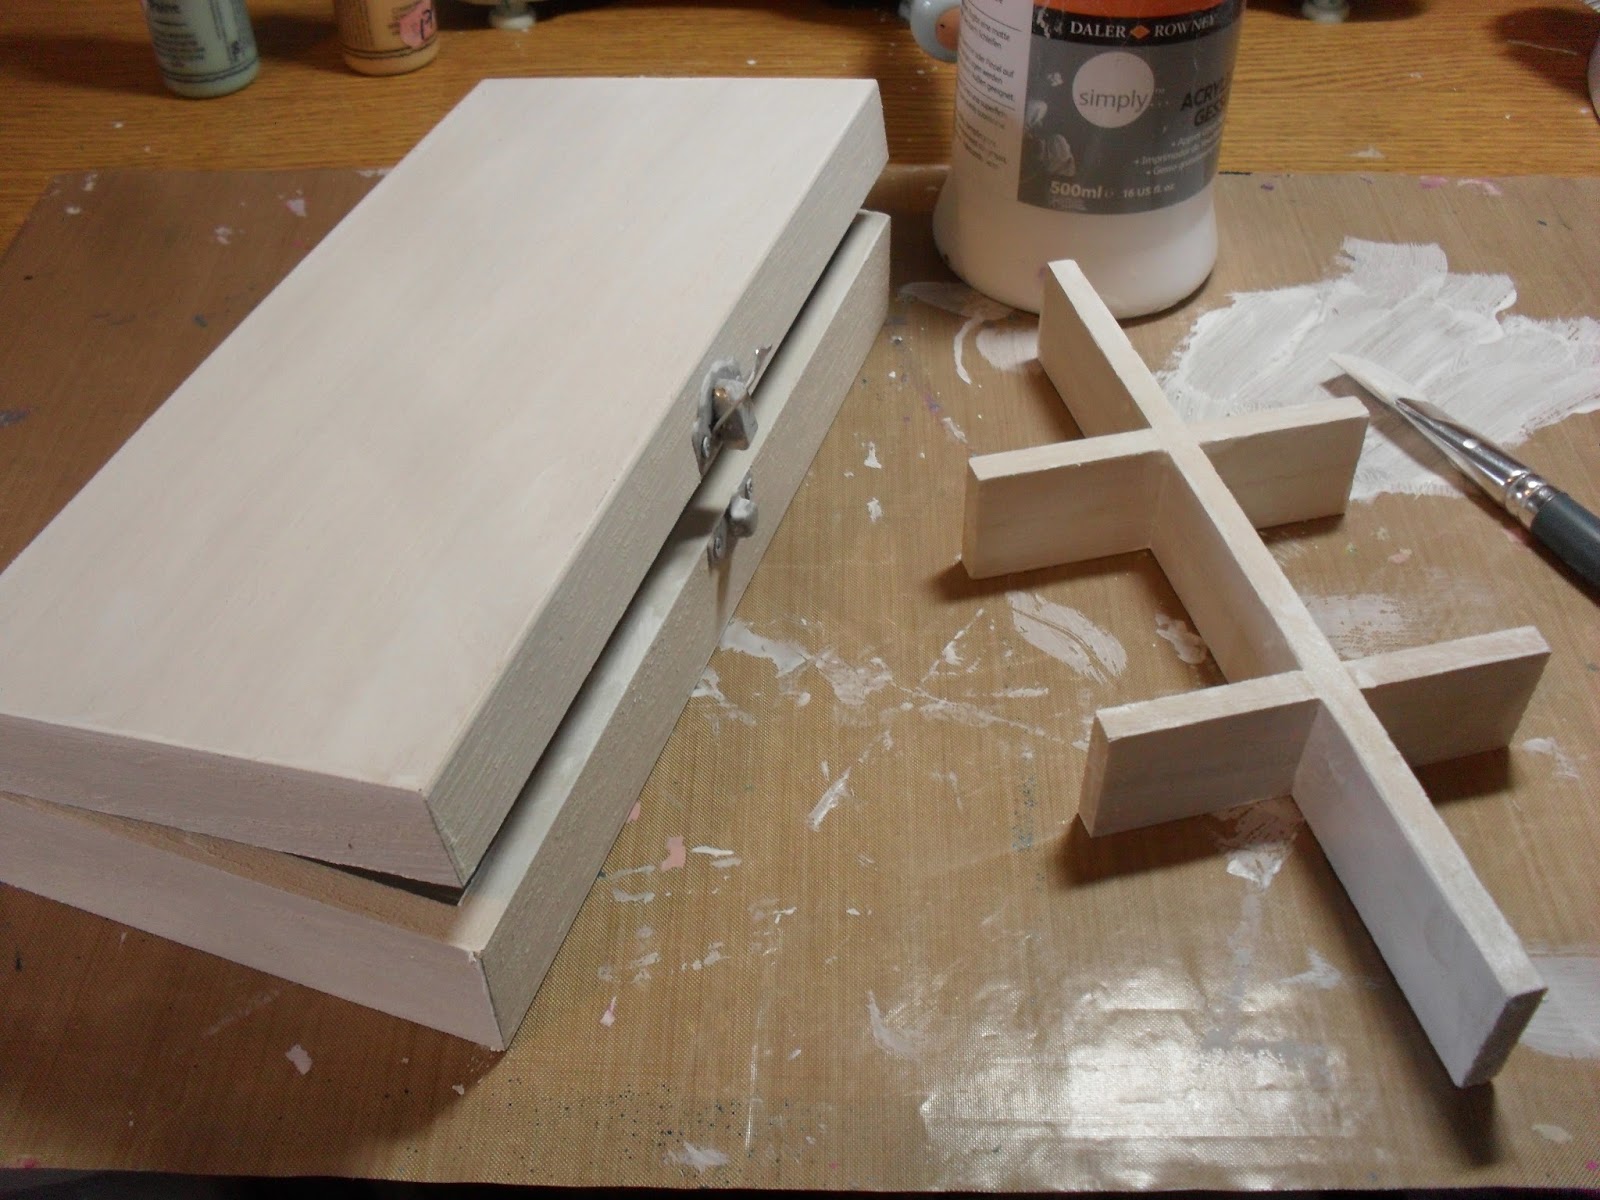
These are all the sections that come in the kit to start the project, ( my finished shrine measures approx 2.5" x 4.5" ).


You will see I painted all my inside sections apart from the front of my house.


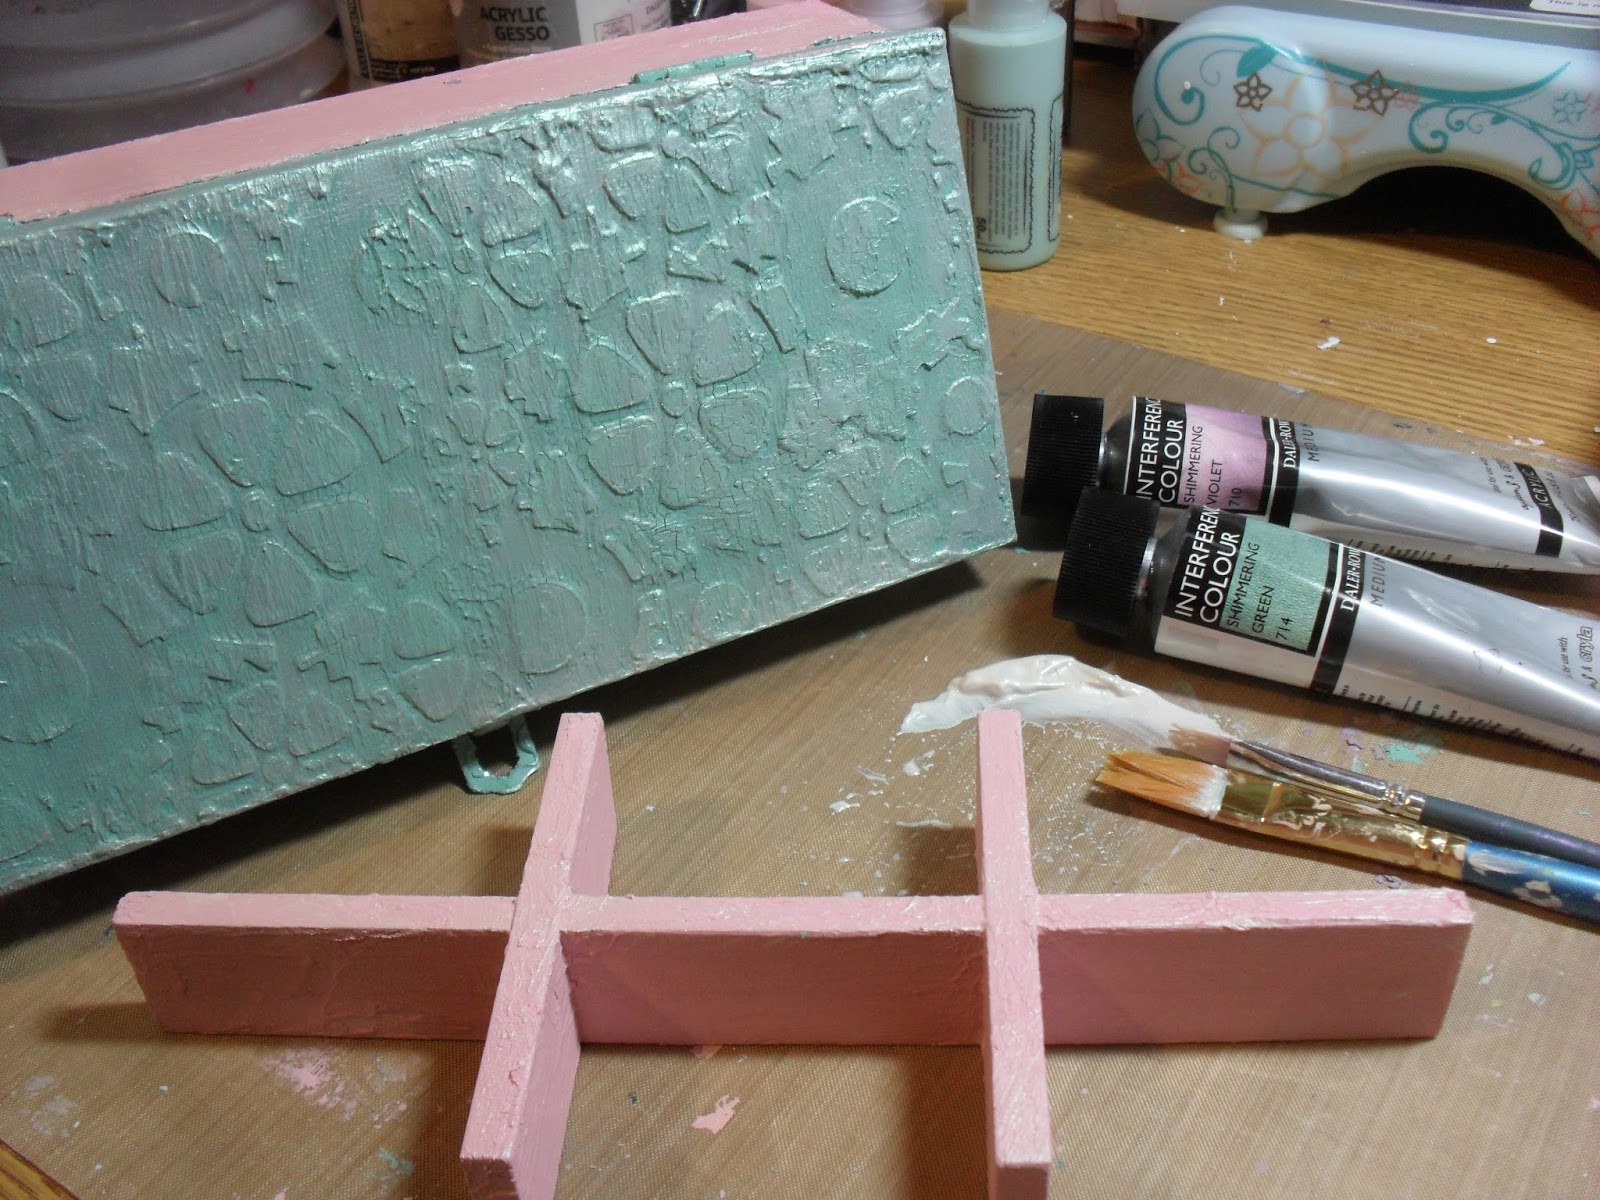
In this photo you will see I added on some heat embossed detail.


Next I made templates in greyboard so I could add a roof onto my house by simply drawing around my shapes. I also roughly worked out placement of embellishments although I changed a bit later on.


I covered my greyboard in Metal foil and ran through my embossing folder. 


I  added my paint and let it slightly dry before buffing back with a dry baby wipe.


I glued my greyboard onto the MDF and added on some rust effects to the edges.


I glued lace onto the front and painted it with Black Gesso.


I then blended in some Mica Powders for highlights with a little water over my lace.


I felt at this point the background was a little dark in my house so I gave it a wash with Titan Buff.


I mixed Bronze Micro Beads with some Matt Gel Medium and applied through my stencil onto my roof. Once this was dry I dripped Alcohol Inks over it.  


I love the look it gives almost like an Abalone Shell.


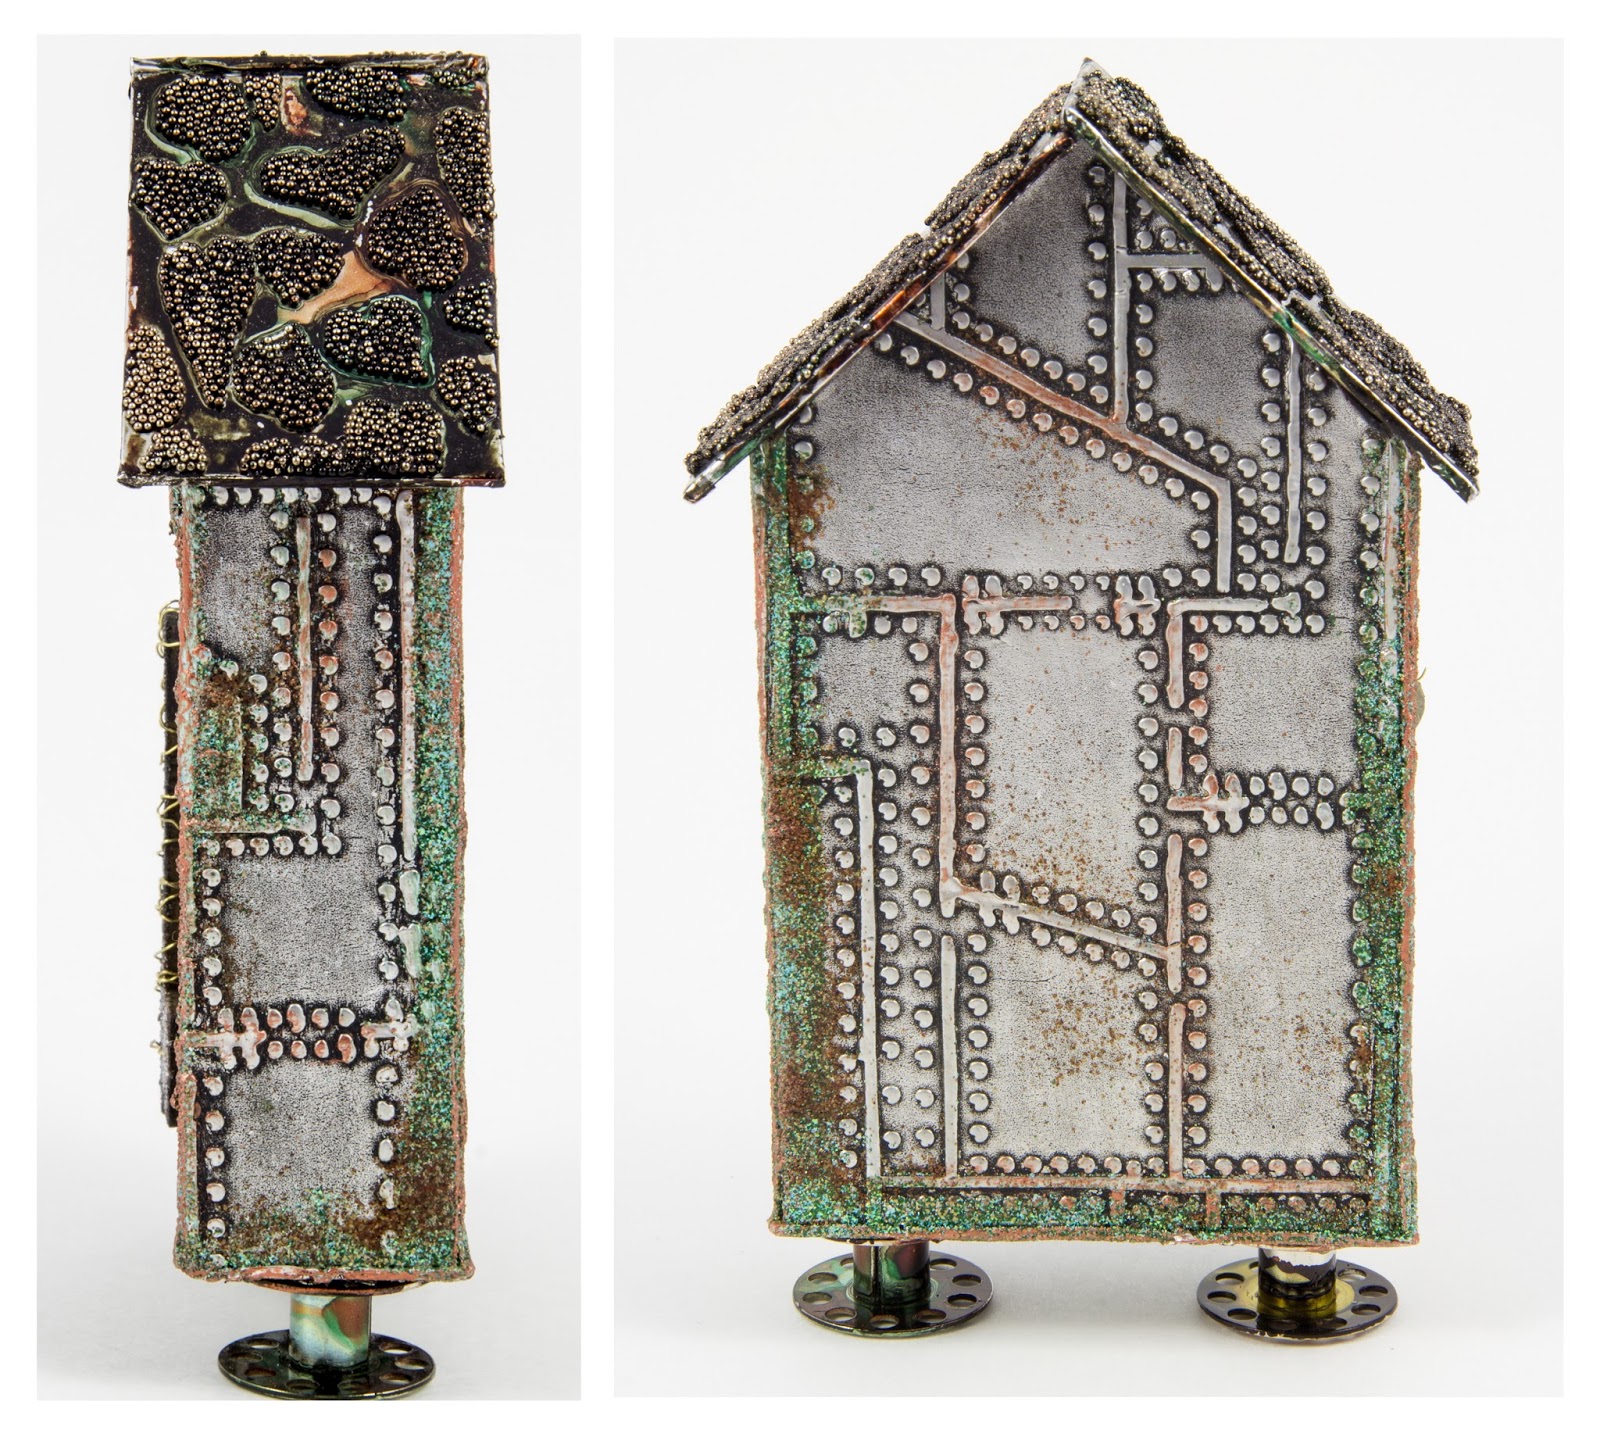
Side on and rear views were highlighted with Inka Golds at the embossed detail. My feet are sewing machine bobbins with some alcohol inks on them. 


I added alcohol ink onto my pearls for a more Industrial look and then glued them around the window opening.


I Rusted my cogs using Andy Skinner's Techniques.


A close up view of the inside showing the cogs in place. My hearts had a layer of Crackle paint and were sprayed with Tarnished Brass Spray Stain, I wiped them back and added a little Black Paint to the edges.


My key was heat embossed with various Embossing and Distress Powders, wrapping around with a little wire. 


I brought out more highlights in my lace using Viva Decor Inka Golds in coordinating shades.


A couple of finished photos. All products used in this post are available at the links below to the shop.

If you have enjoyed my posts at That Craft Place I'd love for you to pop over HERE to my blog to continue to follow me. My followers buttons are down my sidebar and I look forward to following your blog too.


Crafty Hugs,

Julie x
Links you need to know.

Monday, 21 March 2016

Vintage Family Memories - Tutorial Post


Hi everyone and welcome today to my tutorial post, it's Julie here from Juliz Design Post. I created this wall hanging which measures approx 14" x 6" excluding the hanger using products and bespoke MDF all available at Lisa's shop. You will find all the links at the bottom of my post.

So let's get started.  


I ripped book pages into strips and glued in place with Mod Podge and applied crackle paste through my mini heart stencil. Once dry I sprayed over with Antiqued Bronze Distress Stain and wiped back with a baby wipe, to highlight the crackles.


Using Craft Consortium's English Garden Paper pad, I tore layers to reveal the white core and glued in place.


You will notice I marked off the area I wanted to keep blank on my MDF so it would all glue in place neatly and level.


I used a mixture of Embossing Powders and Glass Glitters around my frames to draw the eye into the picture and for an extra added vintage look.


I tattered layers and built up my frames for my images adding in lace, pearls and cheesecloth.


My MDF Pocket Watch from TCP comes with the clock face heat set onto it. I embossed with an Old Gold powder and white washed the clock face, gluing in place and adding a generous layer of Glossy Accents, a Metal Tassle and a touch of bling.


My main image I fussy cut butterflies from Craft Consortiums Gypsy Gypsy Pad and added to my image. Layering on lots of pearls, lace and my floral bouquet. 


My flowers were made using Cheery Lynn's die - B338 Black Eyed Susan Strip. For the MDF heart I used Tattered Rose Distress paint and added a small key from Craft Consortium.


The little twigs you get in a small bundle available from TCP are great for accents and Witches Brooms, this time I rolled them in my Versamark ink Pad and heat set with a Bronze powder adding on some pearl beads. 


I used TCP's Film strip on this side, painting it Black, adding some small Sepia coloured pictures behind and a layer of glossy accents on top.


I finished off by getting my husband to drill a couple of small holes in either side and thread through a metal wire which I threaded with pearls from an old necklace. And finished my centre circle with a strip of pearls around the outside.

All products used are available at That Craft Place.

I hope you have enjoyed my tutorial and feel inspired to incorporate these techniques within your craft projects.

Look forward to you joining our Current Challenge which is Anything Goes.


Crafty Hugs, 

Julie x

Links you need to know.

Tuesday, 8 March 2016

Bead Box Tutorial

Hello lovelies, it's Nicola here with today's tutorial.

I have decorated a lovely wooden box to make a bead box.


The materials you need from That Craft Place 

Wooden Box ~ White Gesso ~ Texture Paste ~ Cog Stencil ~ Cosmic Shimmer Crackle Paints in shades China Pink, Heather , Jade Mint ~ Petal Lu Flowers ~ Pink Ruffle Edge Ribbon ~ Lilac Spiral Stems ~ Cosmic Shimmer Acrylic Glue

Materials already in my own crafty stash...
Spatula ~ Old credit card ~ Daler Rowney Interference Colour Shimmering Green and Shimmering Violet ~ Selection of Beads ~ Pearl Beads on Stems ~ Piece of Broken Jewellery

Step by Steps...

1. Paint the box all over, inside and out, and the dividers with gesso, Leave to dry.


2. Lay the Cog Stencil over the left half of the lid. Use your spatula to add a blob of texture paste onto the stencil.


Use the old credit card and spread the paste evenly over the stencil.


Flip the stencil around so that the pattern joins in the middle. Repeat the same steps  for the right side.


Leave this to dry thoroughly.

3. Paint the box lid with the Jade Mint crackle paint, the base with China Pink, and the inside with Heather. Paint the divider China Pink. Leave to dry. I left mine to dry overnight, you will see the crackles appear when dry.


4. Put a blob of each of the Interference paints onto your craft sheet. Spritz with some water on each blob. Mix each colour with the water to create a wash. Paint the violet on the inside of the box and paint the green interference over the lid and the rest of the outside of the box. Leave to dry. This creates a lovely shimmer effect.


5. Put the divider into place inside the box.  Glue the pink ribbon around the bottom edge. Embellish the top with your Spiral and pearl stems, flowers, beads and broken jewellery using the glue to stick everything into place. Finally fill with some pretty beads.


I hope you have enjoyed my tutorial for this pretty bead box. I really enjoyed decorating this. You could decorate these boxes as a gift for someone and fill it with pretty things they like.

Have fun,
Happy Crafting,
Nicola 
XXX

LINKS YOU NEED TO KNOW...


01 09 10