Followers

Showing posts with label Embossing Powders. Show all posts

Wednesday, 30 March 2016

Steampunk Shrine Tutorial by Julie Lavalette


Hi Everyone, it's Julie here today from Juliz Design Post and I am sadly sharing my last DT tutorial with you at present here at That Craft Place, as our challenge blog and Natter and chatter group are taking a long extended holiday.

Lisa sells the most beautiful MDF Shrines in different shapes along with great embellishments to add to them in Greyboard and MDF, so please check out her shop links at the end of my post as these will still be remaining open.

So let me take you through the process of my shrine.


These are all the sections that come in the kit to start the project, ( my finished shrine measures approx 2.5" x 4.5" ).


You will see I painted all my inside sections apart from the front of my house.


In this photo you will see I added on some heat embossed detail.


Next I made templates in greyboard so I could add a roof onto my house by simply drawing around my shapes. I also roughly worked out placement of embellishments although I changed a bit later on.


I covered my greyboard in Metal foil and ran through my embossing folder. 


I  added my paint and let it slightly dry before buffing back with a dry baby wipe.


I glued my greyboard onto the MDF and added on some rust effects to the edges.


I glued lace onto the front and painted it with Black Gesso.


I then blended in some Mica Powders for highlights with a little water over my lace.


I felt at this point the background was a little dark in my house so I gave it a wash with Titan Buff.


I mixed Bronze Micro Beads with some Matt Gel Medium and applied through my stencil onto my roof. Once this was dry I dripped Alcohol Inks over it.  


I love the look it gives almost like an Abalone Shell.
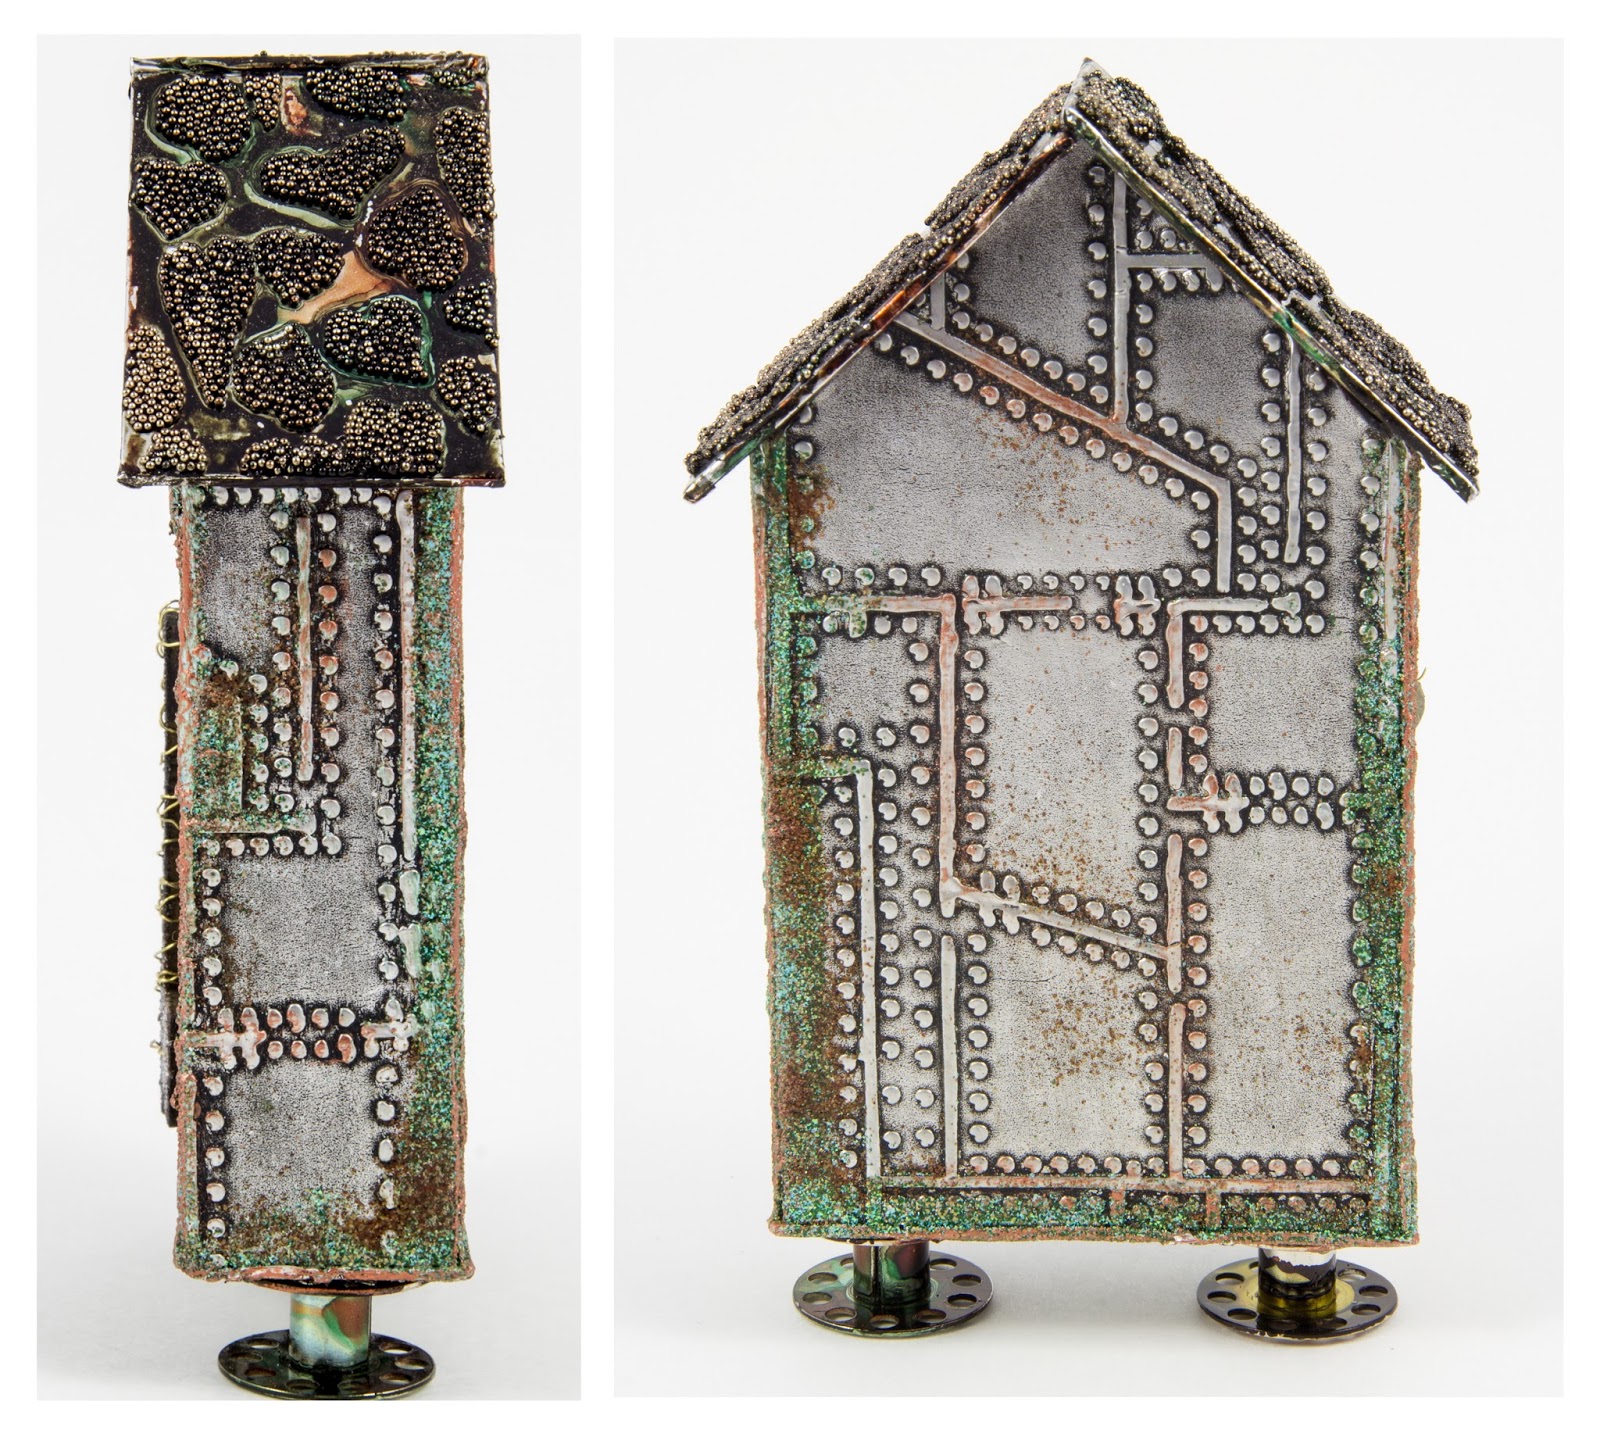


Side on and rear views were highlighted with Inka Golds at the embossed detail. My feet are sewing machine bobbins with some alcohol inks on them. 


I added alcohol ink onto my pearls for a more Industrial look and then glued them around the window opening.


I Rusted my cogs using Andy Skinner's Techniques.


A close up view of the inside showing the cogs in place. My hearts had a layer of Crackle paint and were sprayed with Tarnished Brass Spray Stain, I wiped them back and added a little Black Paint to the edges.


My key was heat embossed with various Embossing and Distress Powders, wrapping around with a little wire. 


I brought out more highlights in my lace using Viva Decor Inka Golds in coordinating shades.


A couple of finished photos. All products used in this post are available at the links below to the shop.

If you have enjoyed my posts at That Craft Place I'd love for you to pop over HERE to my blog to continue to follow me. My followers buttons are down my sidebar and I look forward to following your blog too.


Crafty Hugs,

Julie x
Links you need to know.

Wednesday, 17 February 2016

Valentine's Memory Box Tutorial


Hello and welcome, it's Julie here from Juliz Design Post sharing with you my first tutorial at That Craft Place. I was lucky enough to attend an Andy Skinner Workshop last year where I learned lots of different techniques. You will see many of them on You Tube. This keepsake box uses some of his techniques and inspiration of my own, so let's get started.


I have had this little box that measures approximately 3 x 6 inches in my craft stash for a while and just knew it would look amazing teamed up with products and Bespoke MDF from Lisa's shop.

I started by giving my box a sand to get rid of any rough edges and applied my paint with a square of Cut and Dry Foam, which gives a much smoother finish.


I prefer to apply a thin layer of this product with my finger rather than a brush. Be patient waiting on this drying as using a heat gun it can start to bubble.


I next started to apply a medium layer of Crackle Paint with a brush, the magic begins almost immediately. Andy Skinner calls this his mega crackle technique.


Once dry I gave this a layer of varnish to seal the crackle.


Now where the fun begins to make this box look aged. I brushed over with a very watered down mix of Paper Artsy's gold paint and dried with my heat gun.


I rubbed over my whole box with my anti static bag (this stops powder sticking where you don't want it to) and rubbed around the edges with an embossing ink pad. Adding a mix of gold and bronze embossing powders and heating setting in place. Next highlighting the edges with a little more red paint to define. 


Next I pressed my embossing ink onto my MDF Hinges and added gold shades of embossing powder. I started to melt with the heat gun and kept adding and sprinkling Distress Powder in Vintage Photo and a Verdigris shade until I was happy with the result.


Finishing them off with a little black paint scuffed over the edges with a baby wipe.


I used Craft Consortium's Red Roses Decoupage papers to line the inside of my box. My MDF Hearts were painted with the same red paint, I then added some embossing powder around the edges of the hearts in the same way I did the outer box. Next I added a layer of Deco Art Clear Crackle Glaze. Once dry I rubbed over with Deco Art White Antiquing Cream to highlight the cracks and added Ranger Chit Chat stickers.


My Cheery Lynn Photo Frames ( B673 Film Set ) were die cut out in Black Cardstock and heat embossed with clear powder to look like camera film. I used my scratchy tool on my Tim Holtz Lost Relatives photos to shabby them up.


The flat button from Creative Expressions I highlighted with a little Gilding Wax and added some red paint to my MDF word and glued both in place with Cosmic Shimmer Glue.   

All the products used on my box are available at That Craft Place. I hope you enjoyed my tutorial and feel inspired to try out these techniques with the designs.

                                                         Links you need to know:

                                   That Craft Place Facebook Shop
                               That Craft Place Natter chatter page
                                           That Craft Place Etsy
                                              That Craft Place


I would love if you have time to leave a comment. 

Crafty Hugs,

Julie x

                                                   
01 09 10